Showing posts with label tutorial. Show all posts

Tuesday, March 5, 2019

Patrolling Enemy Tutorial


One of the most-requested features I get asked about in the Game Design classes I teach is how to make a patrolling enemy that will "spot" the player. I've been making a lot of video tutorials lately, but for this one I've decided to make a text tutorial. So here it is, how to set up a basic patrolling enemy that will "spot" the player.


Patrolling Enemy
Download Enemy Character and Animations from Mixamo
  1. Log in or sign up
  2. From the Characters tab, select a character you like
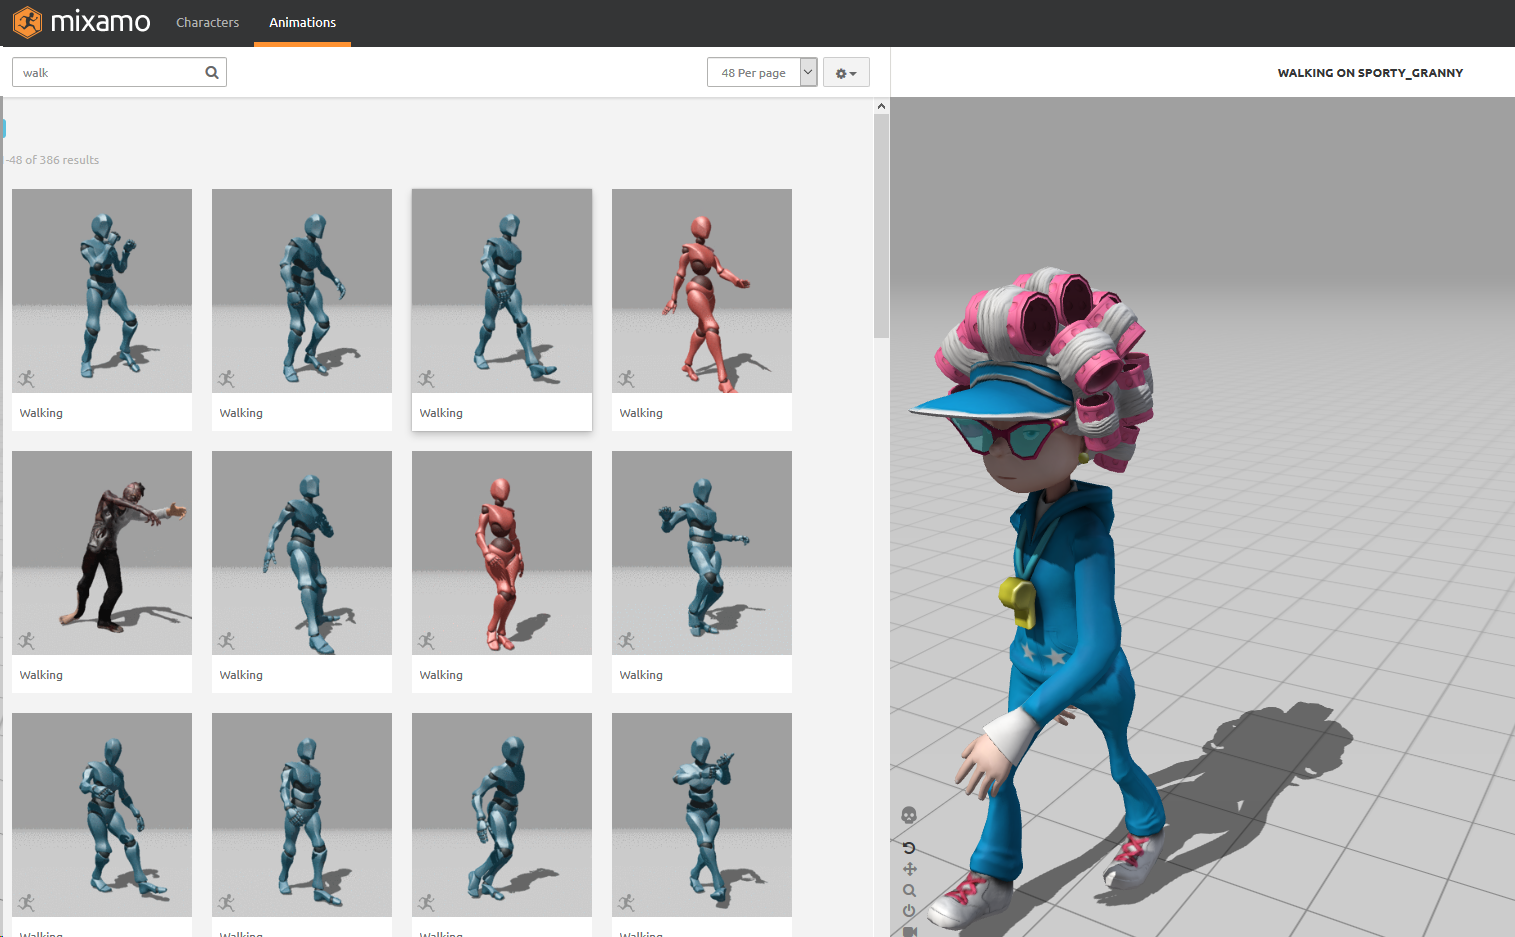
  3. From the Animations tab, select a walk cycle
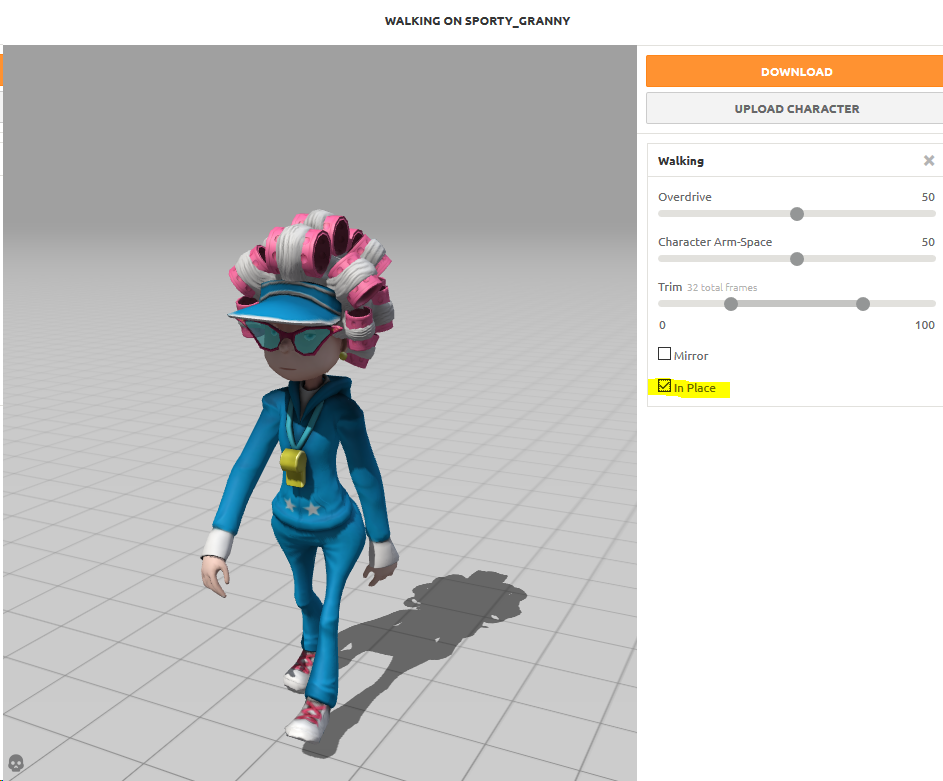
  4. Check the box for In Place
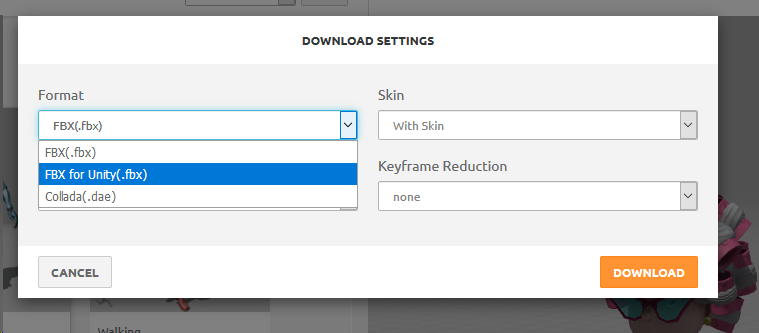
  5. Download as FBX for Unity
  6. Download a second time for Collada, which gives a .zip folder with the texture files
  7. Find a second animation, such as an Attack, and download as FBX for Unity
  8. Import the FBX and the texture files to Unity
Setup and Bake NavMesh in Unity
  1. Create a Ground Plane in a new empty scene
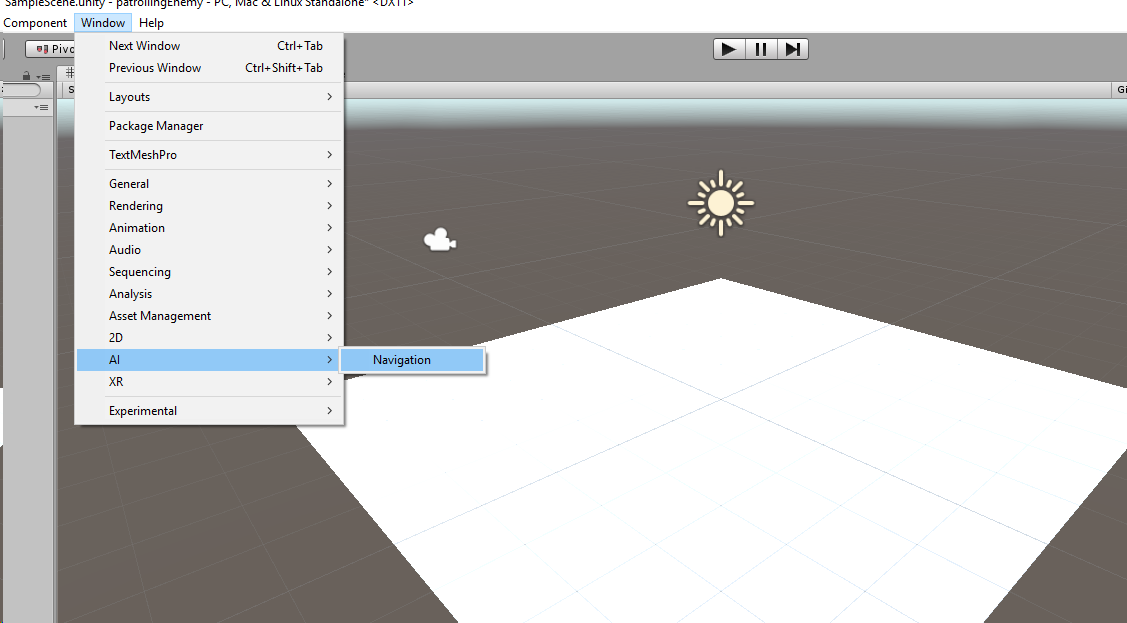
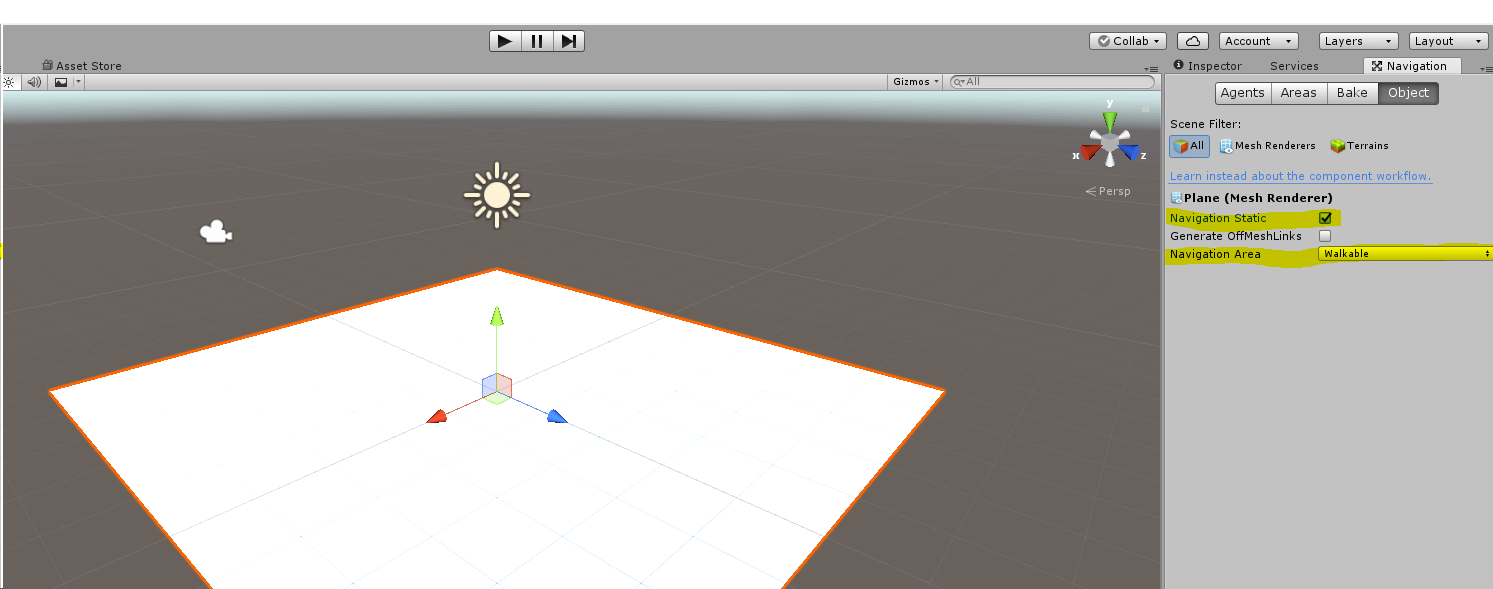
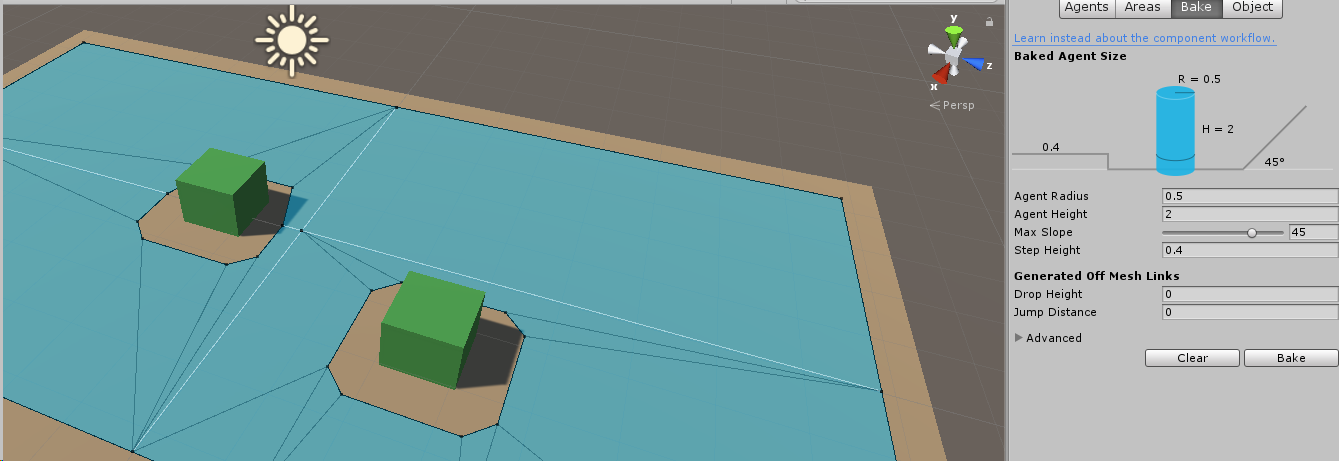
  2. Open the navigation panel: Window > AI > Navigation
  3. Select the Ground Plane and mark it as Navigation Static and Walkable
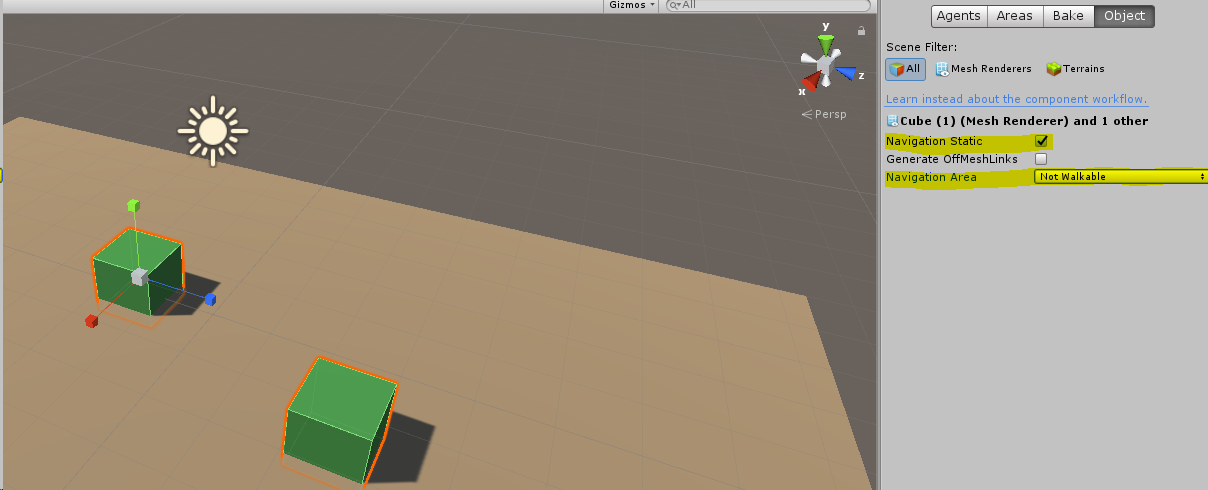
  4. Create some obstacles for the enemy to walk around, it’s a good idea to change the color of the ground and obstacle so you can see what you’re doing
  5. Marke the obstacles as Navigation Static and Not Walkable
  6. Select the Bake tab and choose Bake
Create NavMeshAgent and Player Character Controller
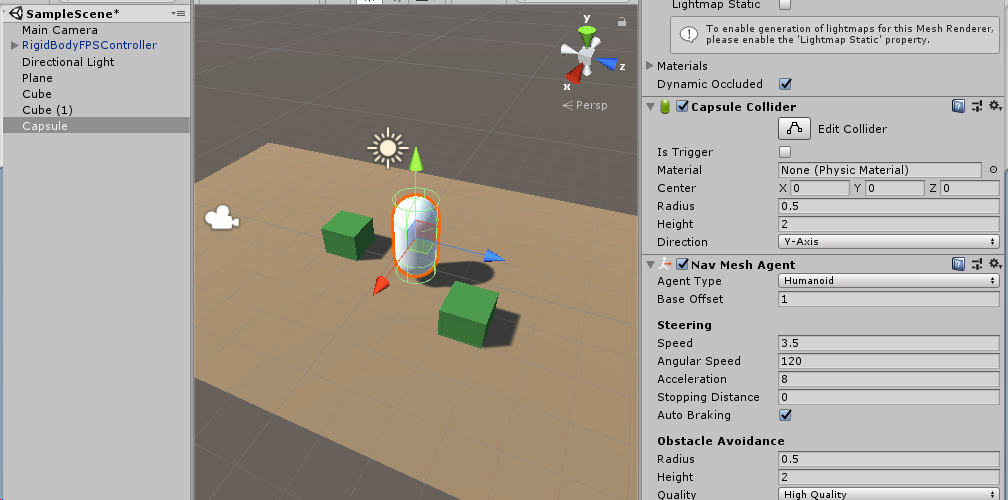
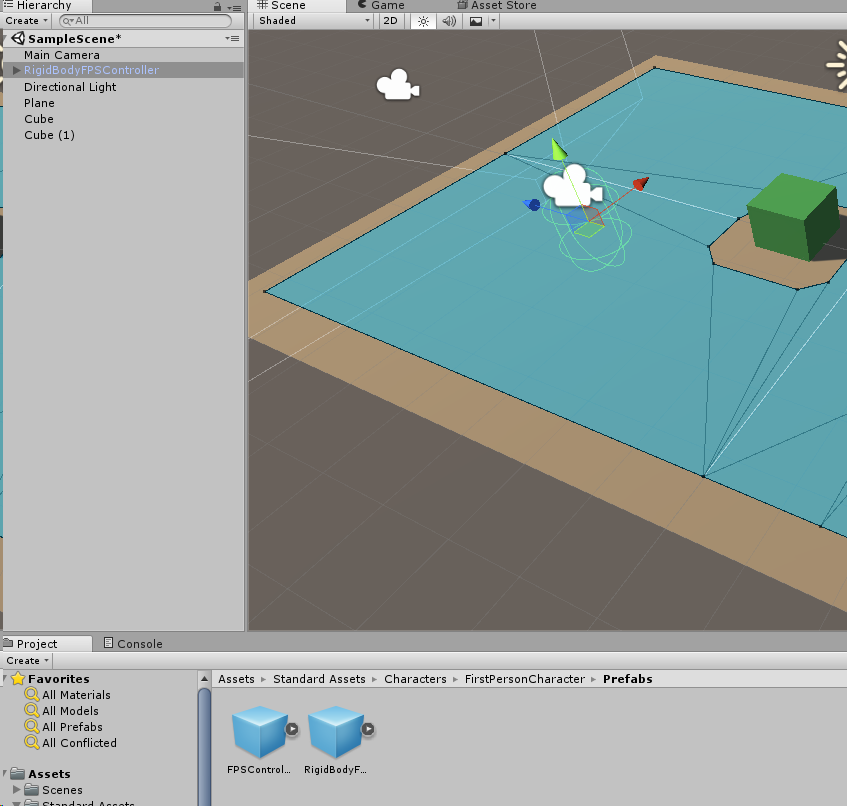
  1. Create a Character Controller for the player, or download the Unity Standard Assets FPS controller and place it in your scene (if using the FPS controller, be sure it is above the ground)
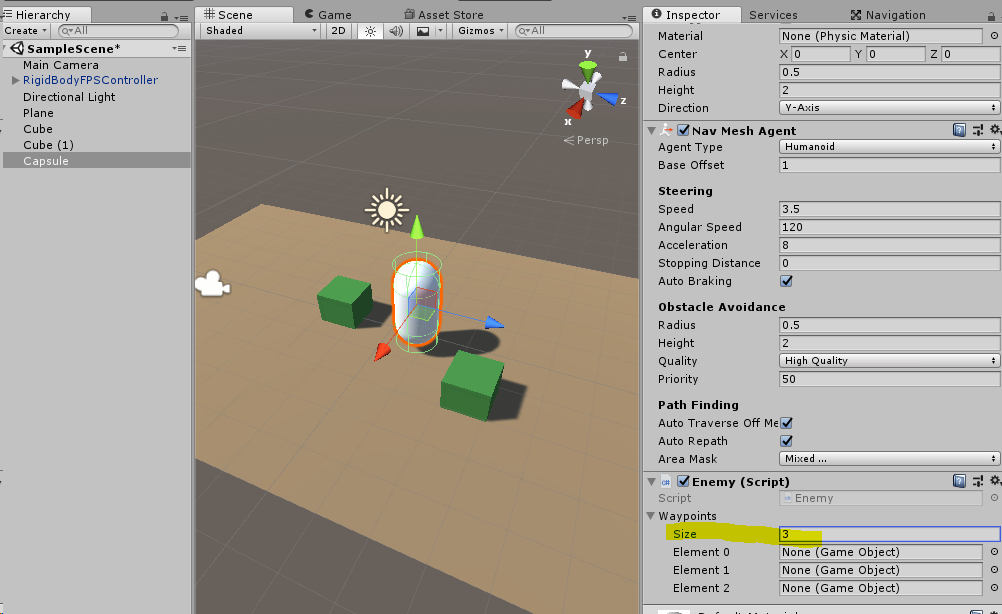
  2. Create a 3D Capsule object in your scene and give it a NavMeshAgent Component
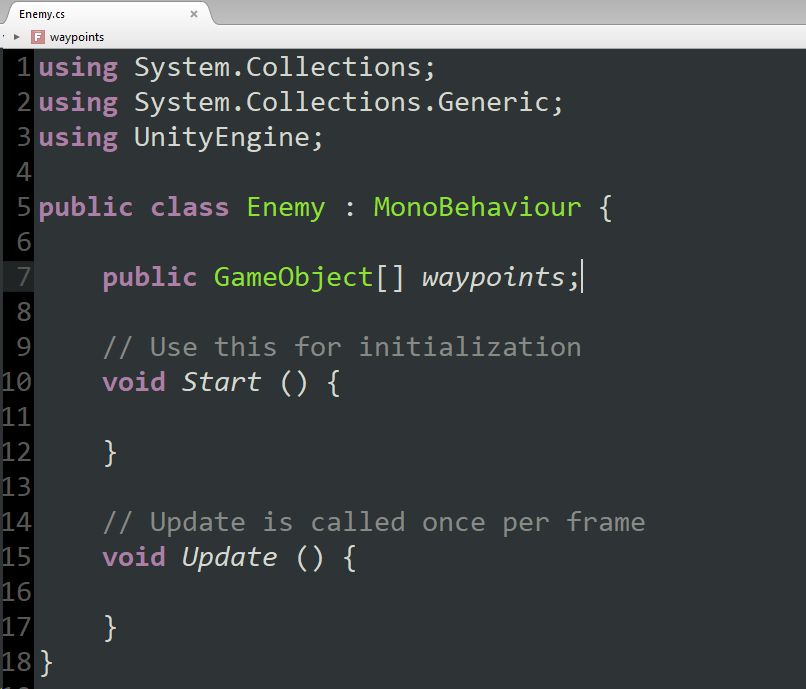
  3. Create a new C# Script called Enemy and attach it to the Capsule
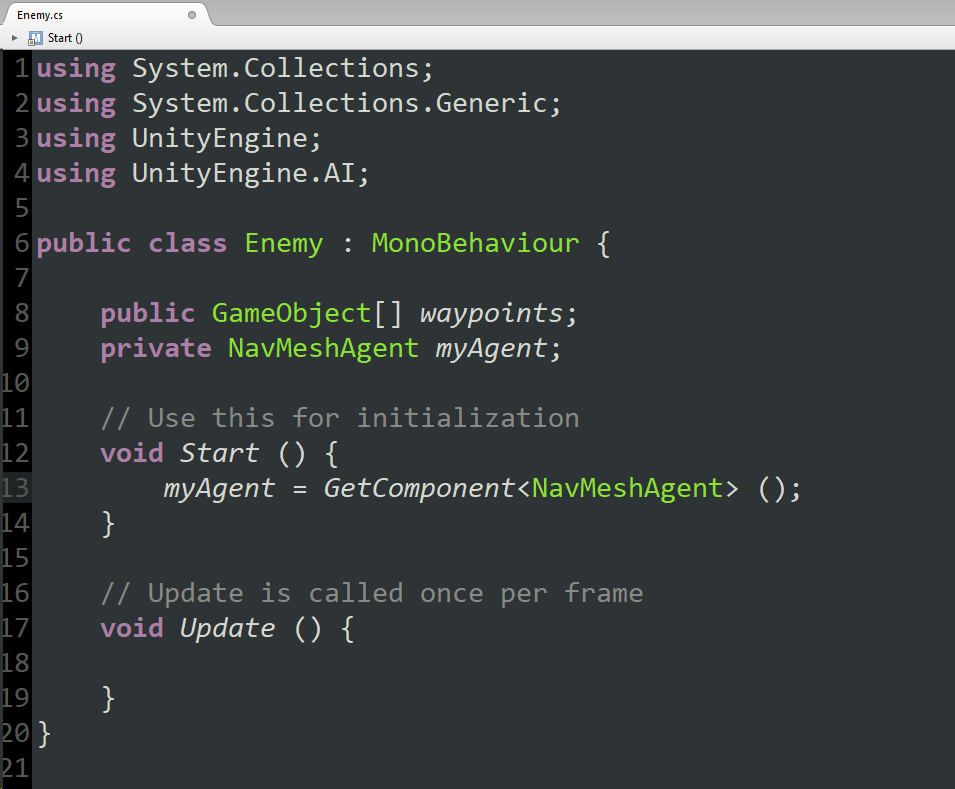
  4. Open the script and create a Public Array of GameObjects
  5. Back in the Unity scene, select the Capsule and set the public array size to 3
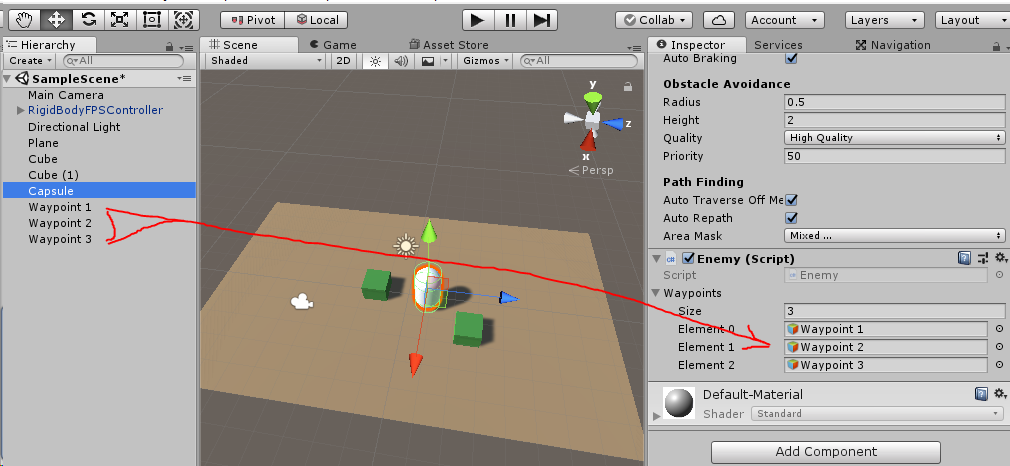
  6. Create 3 Empty GameObjects and place them around the scene (these will be the waypoints for the enemy to walk to)
  7. Drag each of the waypoints into one of the GameObject slots on the Capsule
  8. Back in the Enemy script, add using UnityEngine.AI to the top of the script, create a private NavMeshAgent and in the Start function give it a reference to the NavMeshAgent component
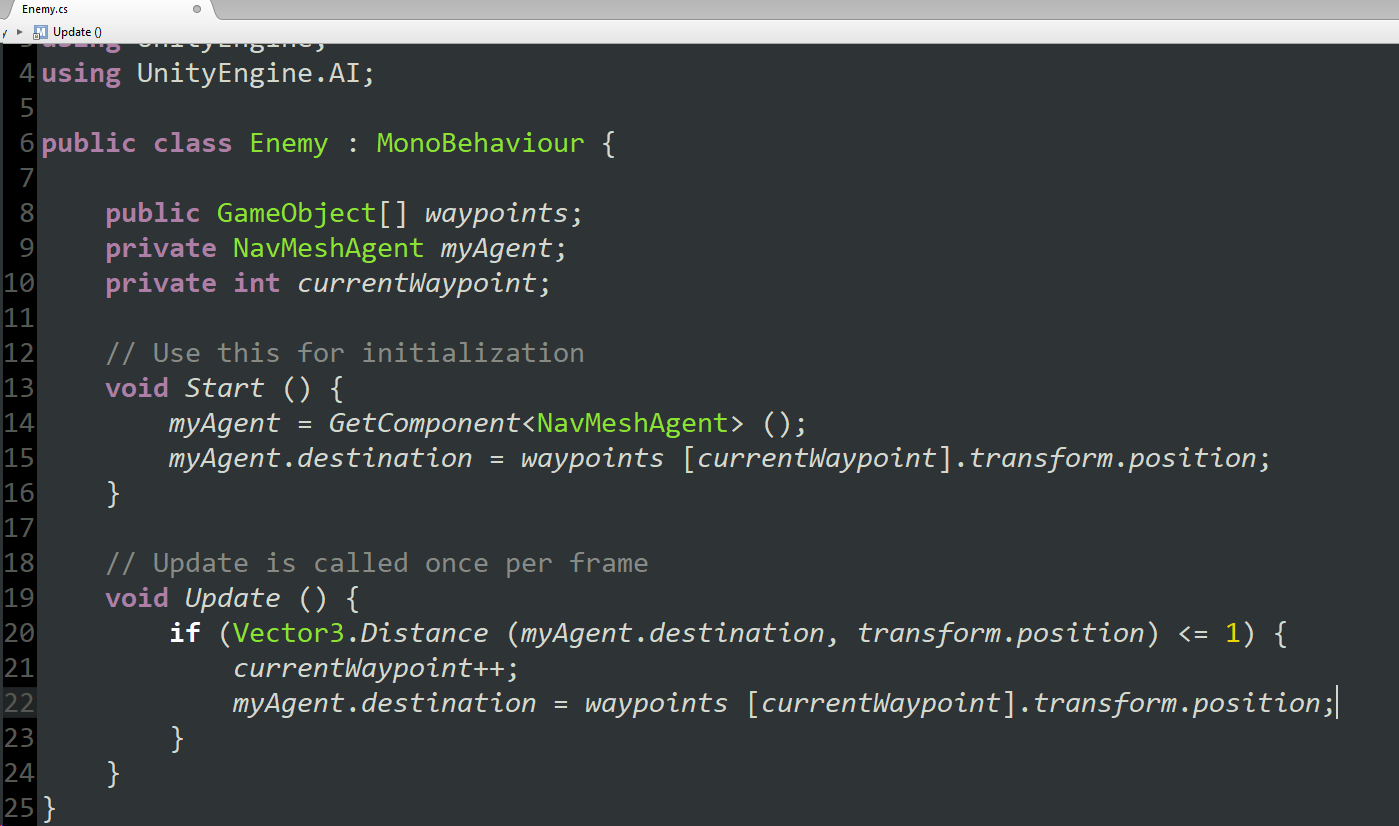
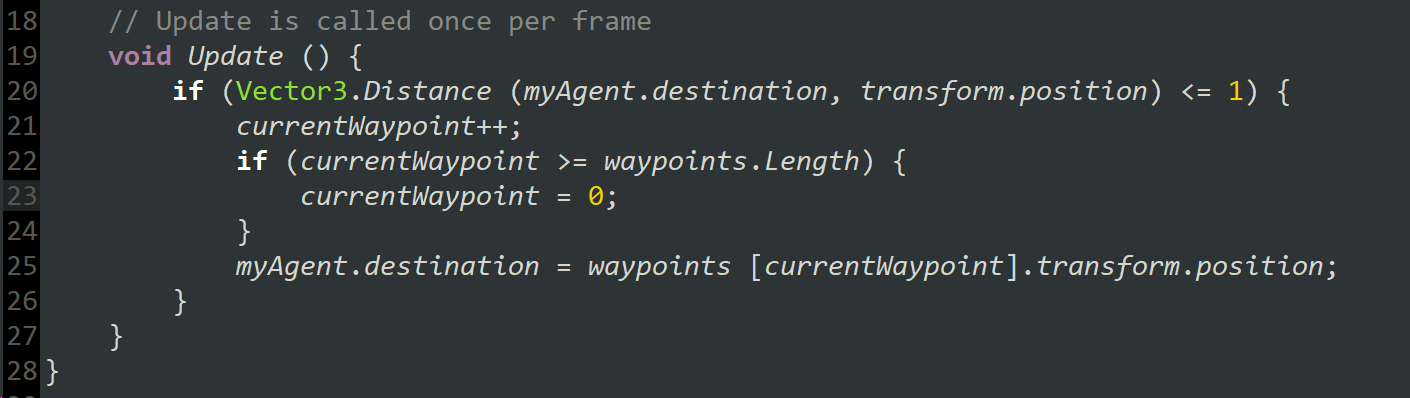
  9. Create a private int to keep track of the current waypoint, then in the Start and Update functions specify the desired waypoint for the NavMeshAgent.destination
  10. Save and test and you will see the enemy walk between each of the waypoints until it reaches the end of the patrol path...update the script so the patrol loops by resetting currentWaypoint to 0 when you reach the end
  11. Test again to ensure the enemy loops on the patrol path
Link Character Model and Animation to NavMeshAgent
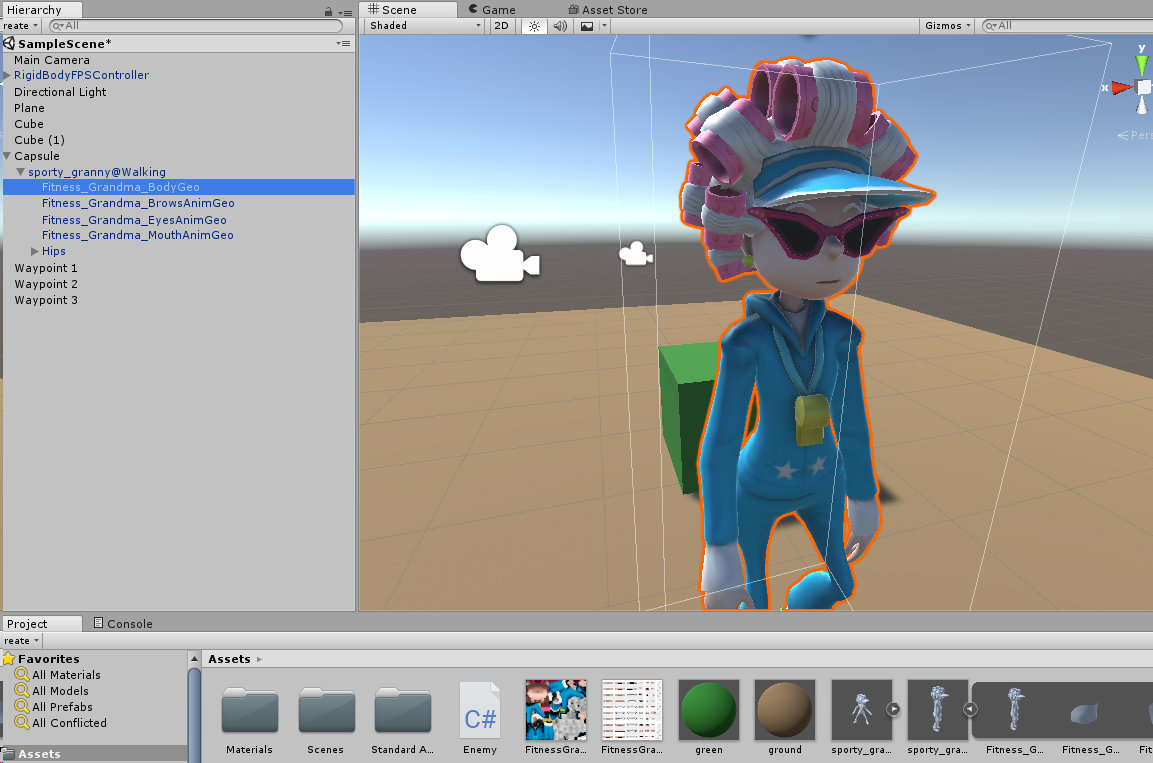
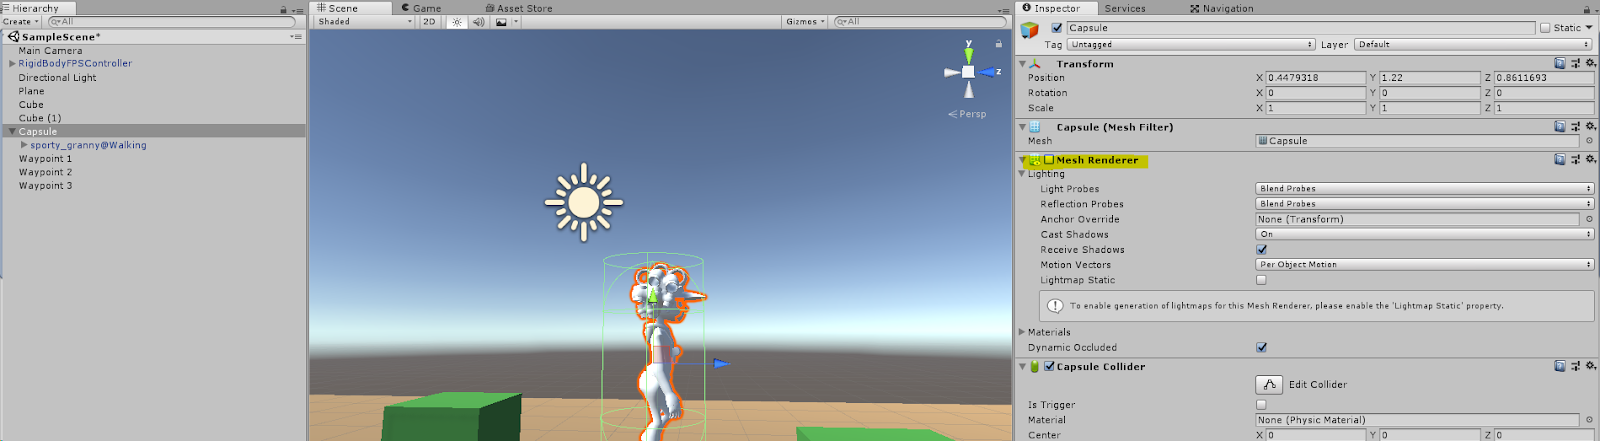
  1. Drag the enemy character model onto the Capsule to make it a child and turn off the Mesh Renderer on the Capsule
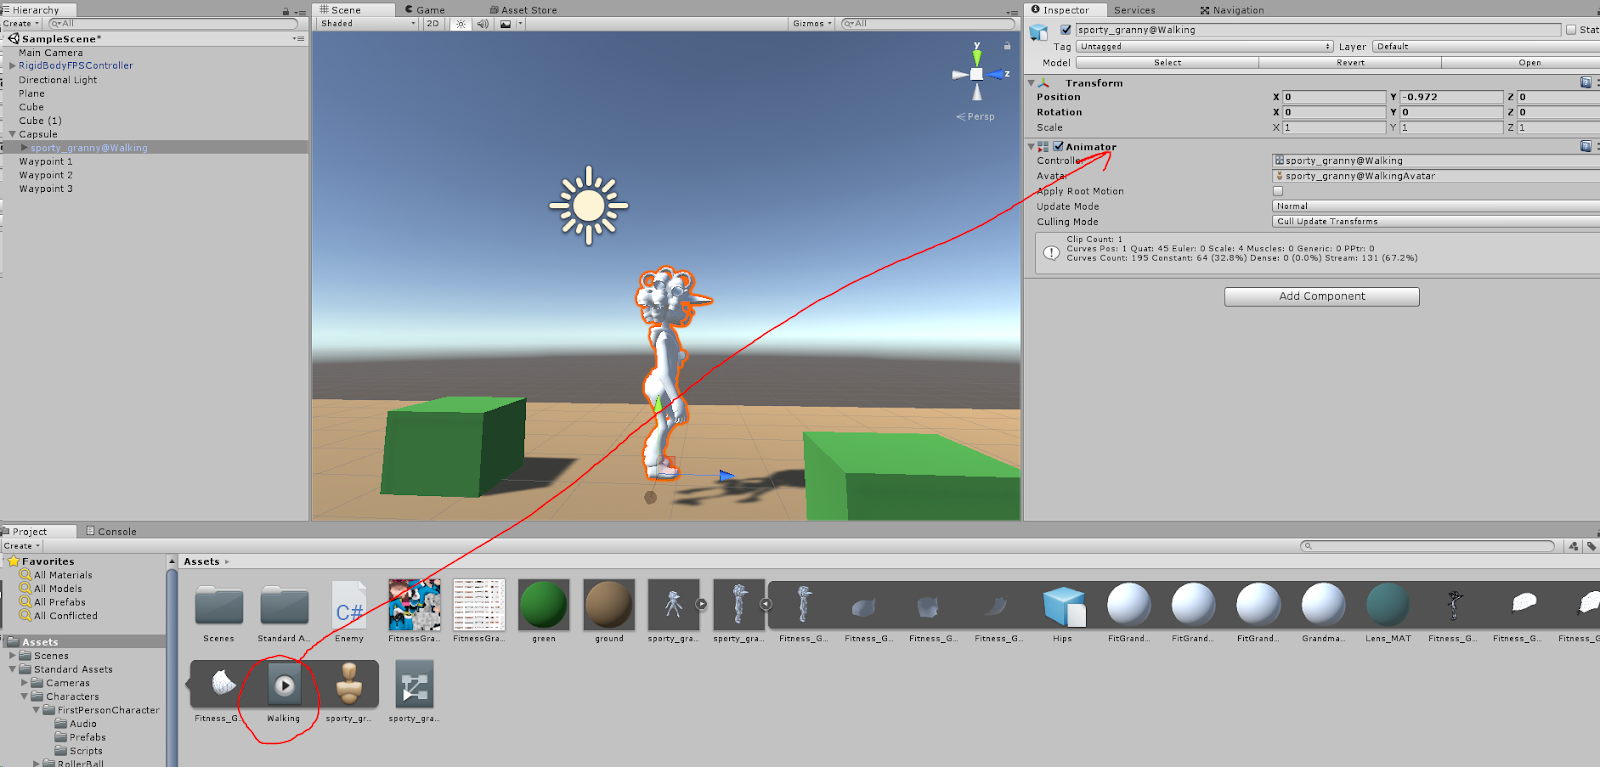
  2. Select the enemy character model in the scene and drag the Walking animation onto the Animator component

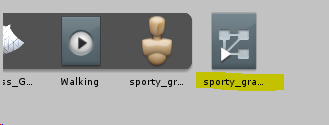
    Note that it creates an Animator Controller in your project folder when you do this
  3. Apply the textures to the character Geo
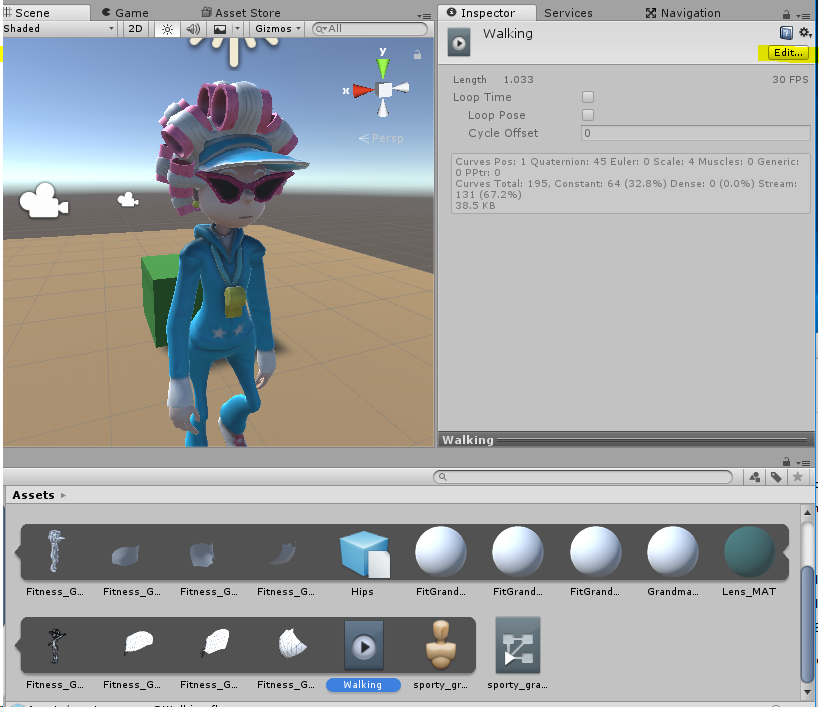
  4. Select the walking animation and choose Edit
  5. Check the box for Loop Time and Apply
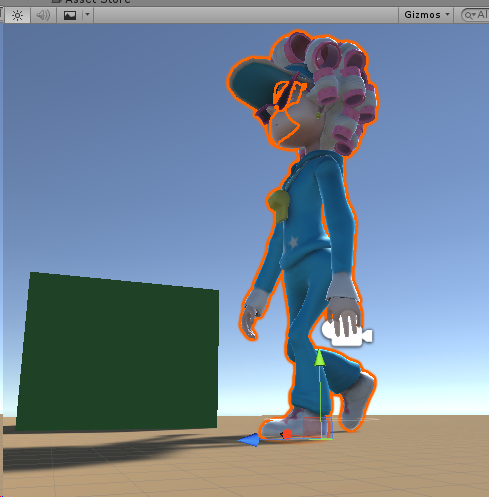
  6. Test again to see the character walking along the patrol path. While testing, check to ensure the character’s feet are making contact with the ground
Script Enemy Vision and Attack Trigger
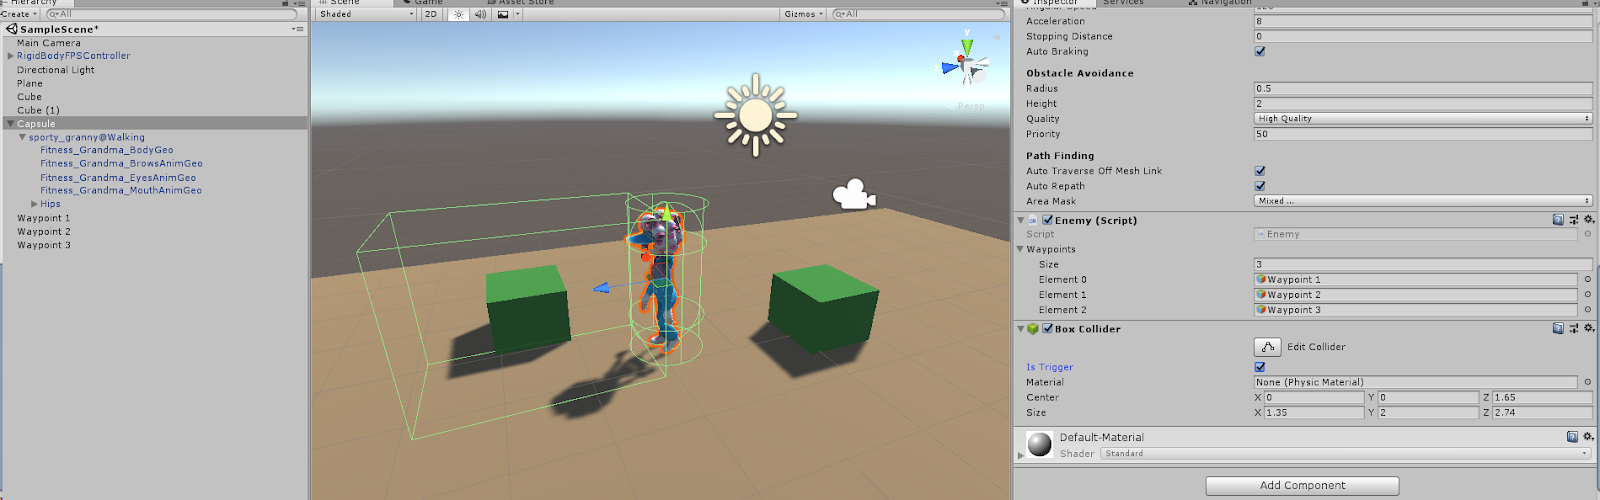
  1. Attach a Box Collider component to the enemy Capsule and mark it as Is Trigger and position and scale it to represent the view area of the enemy
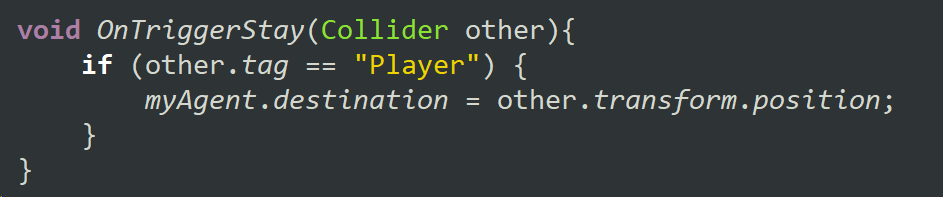
  2. Add an OnTriggerStay function to your Enemy script to check for the Player character
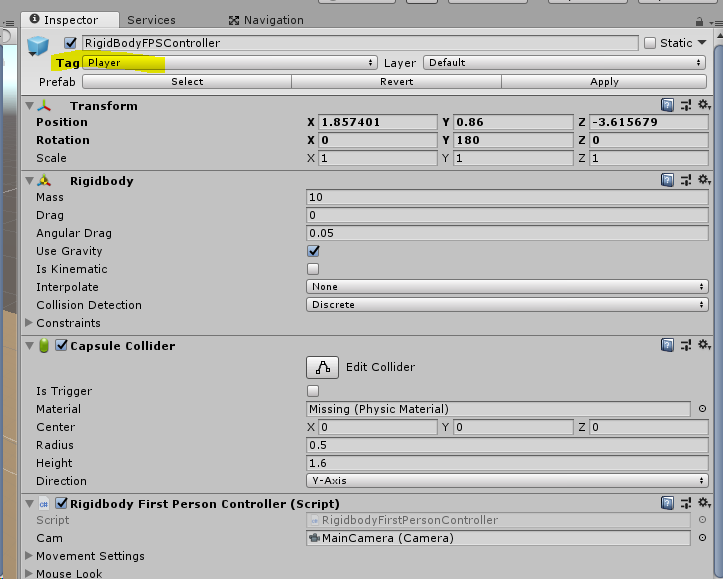
  3. Be sure to tag the player as Player
  4. You may want to expand your play space to test this new functionality, be sure to rebake the NavMesh if you do
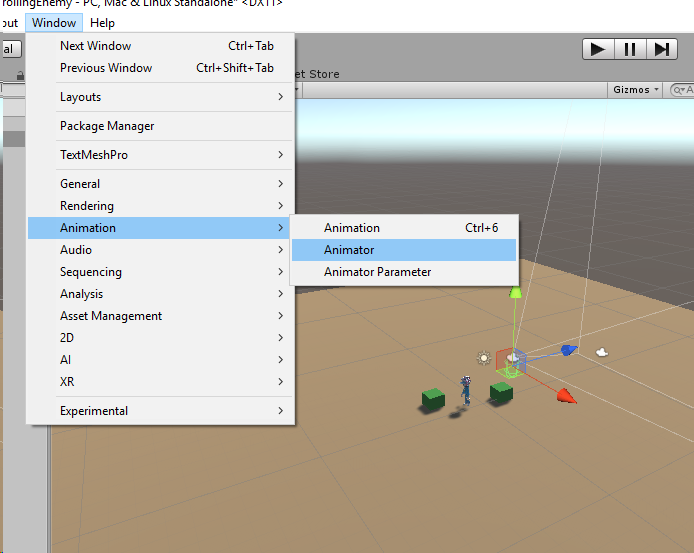
  5. Open the Animator wind from Window > Animation > Animator
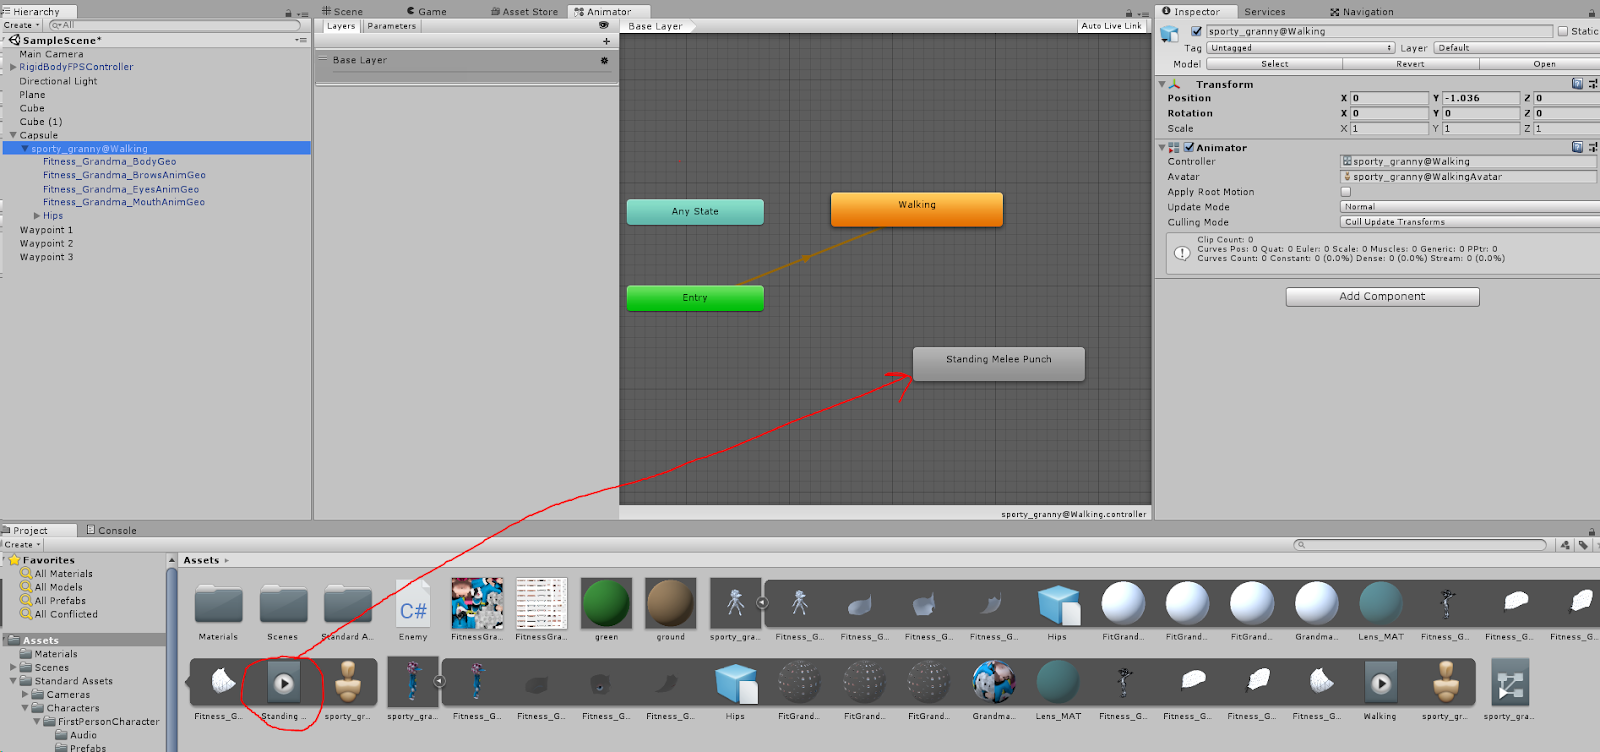
  6. Select the animated enemy character and drag the Attack animation into the Animator
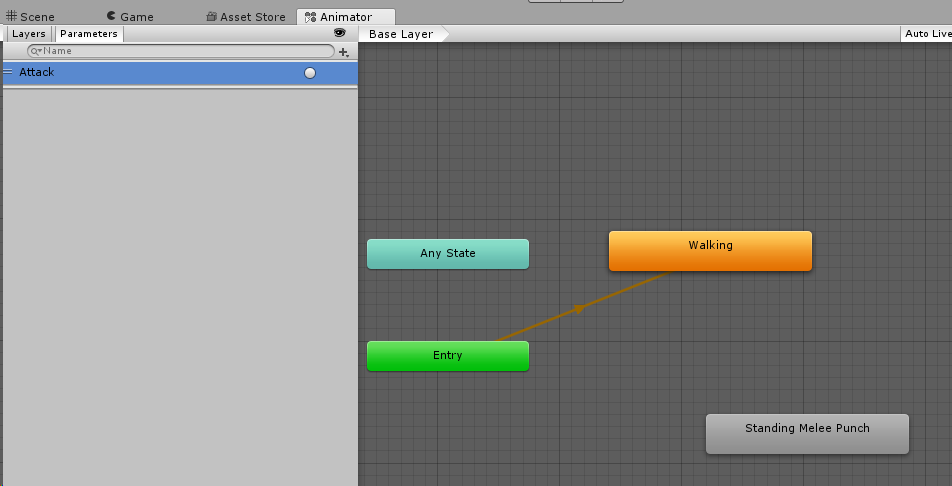
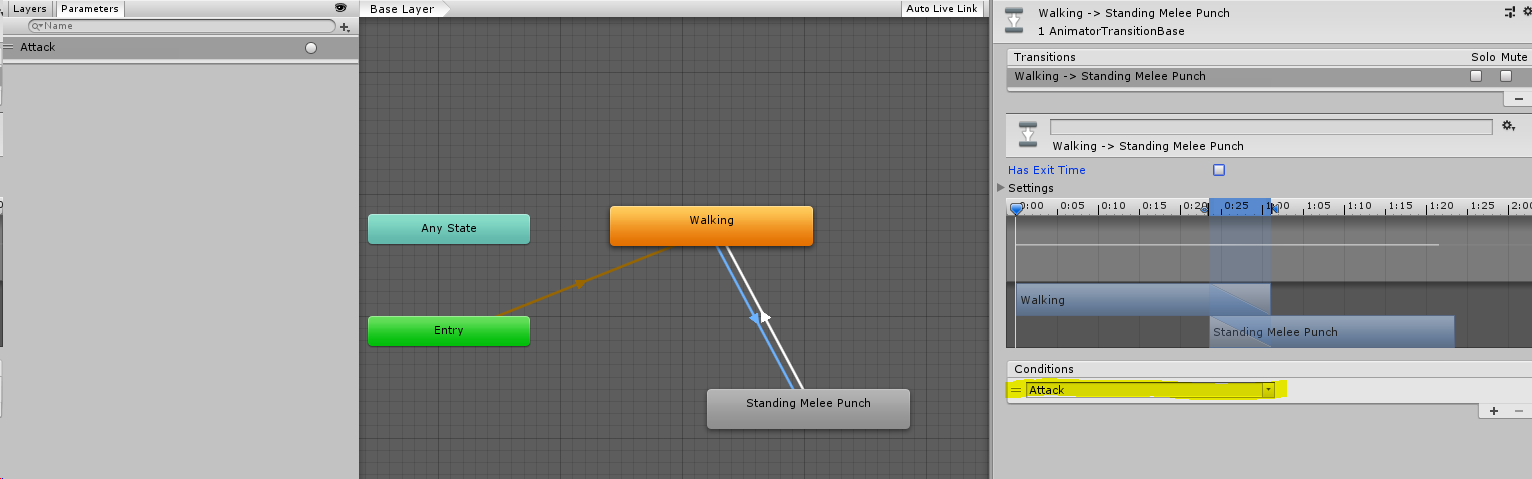
  7. On the Parameters tab make a new Trigger called ‘Attack’
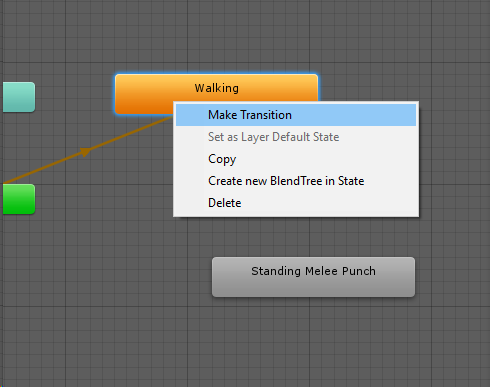
  8. Right click on the Walking animation and make a transition to the Attack animation
  9. Make a corresponding transition from the Attack to the Walking animation
  10. Select the transition to the Attack and add a condition for the Attack trigger you made before and uncheck the box for Has Exit Time
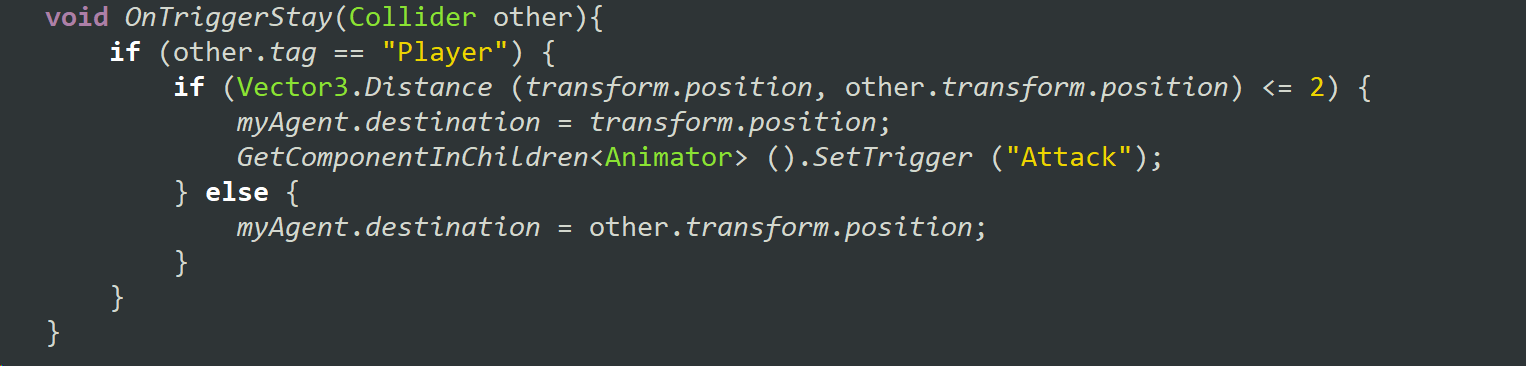
  11. If the enemy is within range of the player, set the target destination to the enemy’s current position and trigger the attack animation, otherwise use the player’s position as the destination
Summary
After completing these steps, you should have a patrolling character that will interrupt it’s patrol to follow the player if the player gets in her view range, and if the enemy gets close enough to the player while following she will attack. If the player gets out of the view range of the enemy she will return to her patrol.

Thanks for reading, and if you've found this tutorial helpful I hope you will subscribe here and on my Youtube channel: www.youtube.com/c/AstireGames

Sunday, August 5, 2018

Prototyping Game Systems, Part 2: Building a Prototype Play Space

This is Part 2 of a 5 part series on my latest course on Pluralsight: Prototyping Game Systems. If you missed Part 1 be sure to start there!

In part 1 we covered the design-prototype relationship, how to assess design needs, and we discussed game mechanics and systems. Next we need a playable space to prototype in. When prototyping in an existing game, it's generally best to make a "safe" scene for prototyping the new mechanics, to avoid causing issues that might break the main playable scene. This is especially important if multiple developers are working on the project simultaneously.

In this course we are using Unity to develop the game, and Unity has an excellent built-in prototyping tool called Pro Builder.


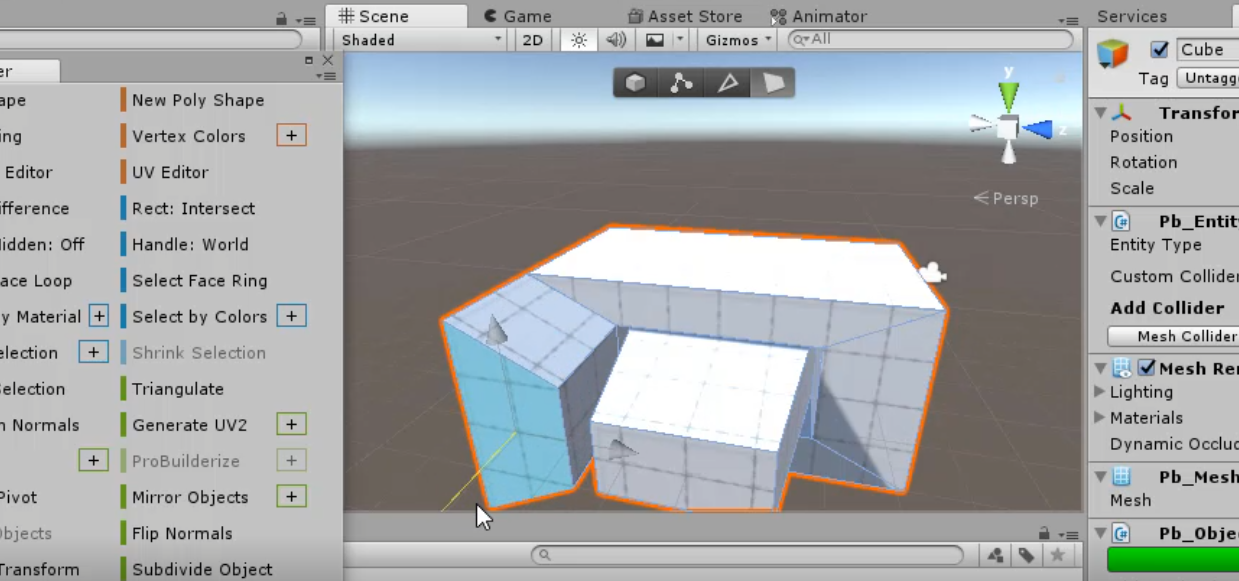
Pro Builder allows you to create and manipulate 3D shapes in the Unity editor, without needing an external 3D modeling tool.


With the help of Pro Builder, you can easily shape out a playable space in just a matter of minutes. The manipulator tool allows you to adjust faces, edges, and vertices.


You can also extrude and bevel to make interesting shapes and crevices.


And when you are satisfied with your shape, you can apply textures, either to the entire shape or to individual faces. Pro Builder even has a simple UV editor to give you more precision for the texture.

For this course I've created a large open space with stairs and an arch, so the walkable ground has various heights and there is an area to walk under where the character won't be visible.


Next we drop in our character model and add a nav mesh. This game is in 3rd person, and the character controller has already been built for us and uses the nav mesh to move around.


The way the nav mesh works is it collects information about any surfaces that are marked "Static" and generates a "walkable" area, shown with a blue overlay. This nav mesh tells the character where it can walk via a Nav Mesh Agent component, which is attached to the character controller.


Now we have a playable space set up for our character to run around that doesn't interfere with the main scenes of the game, so we are all ready to start prototyping the new mechanics.


In part 3 we will build new mechanics for the game, including digging, looting, and powerups. Thanks for reading, and if you enjoyed this please check out the full course on Pluralsight: Prototyping Game Systems for Swords and Shovels.


Tuesday, July 31, 2018

Prototyping Game Systems, Part 1: Design-Prototype Relationship

In this 5 part series I will give an overview of the topics covered in my new Pluralsight course Prototyping Game Systems for Swords and Shovels.


This is an intermediate course for developers who have some experience with Unity and are ready to start building systems. If you are new to Unity, I recommend starting with my Game Prototyping in Unity blog series.

The Prototyping Game Systems course covers:

  • Understanding the Design-Prototype Relationship
  • Building a Prototype Play Space
  • Prototyping Non-Combat Systems
  • Adding Juicy Interactions
  • Playtesting and Iterating Based on Feedback
Let's get started with the Design-Prototype Relationship. 


Prototype is a broad term that is used in many industries to describe an early sample of a product used to test a concept or process. Within the game industry, we typically use prototype to describe a playable game concept that was created quickly to test new ideas. It’s important to note that nowhere in this definition does it say this needs to be created in a game engine, or even on a computer. The purpose of the prototype is to test an idea, and often the first test should be on paper. 


You might hear game developers refer to a paper prototype, which is a playable game concept created on paper or using physical objects like cards, dice, or game pieces. Basically anything you can use to test your idea without doing any coding or creating any digital content. Paper prototyping is very useful at the start of a project when you’re not really sure what you’re making and you don’t have any scripts or art assets to work with. This course specifically focuses on digital prototypes because it is working within the framework of an in-progress game, so there are already some art assets and scripts to work with. 


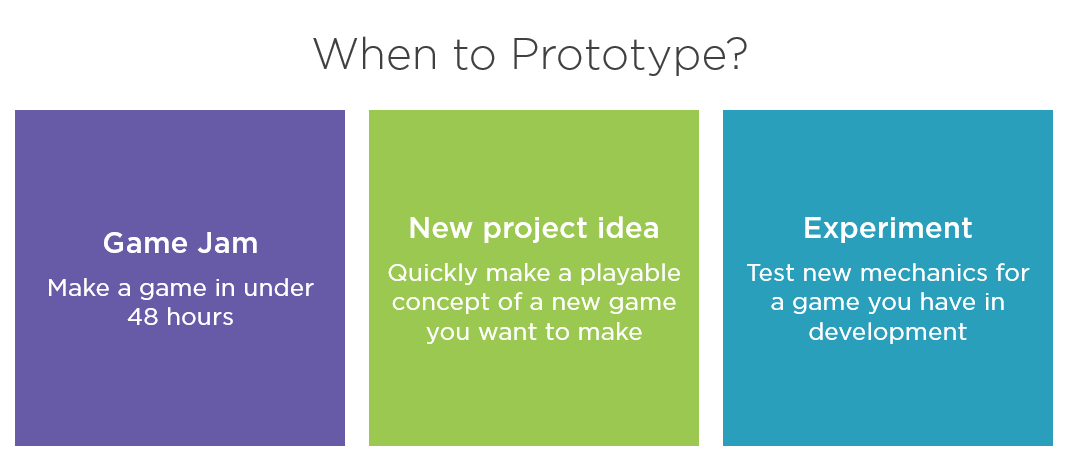
The three most common/useful times to prototype are during a Game Jam; when starting a new project; or when experimenting with new systems or mechanics for an existing project. This course covers the third option, creating and testing new systems within an existing project. Many aspiring game developers get their start working on games from scratch, either with student projects or side projects they take up on their own. Being able to integrate your work into an existing project is a major turning point for new developers, and one of the most desirable skills in a new entry-level hire. 

So now we know when to prototype, but what are we prototyping? Generally we prototype Game Mechanics, or Game Systems which are collections of mechanics that work together. What is a Game Mechanic? Game mechanics are the rules that determine how the game functions, how the user interacts with the game, and how the game responds to the user. 

A very simple example of a mechanic might be to click on an item to pick it up. Generally when you start to explain a mechanic, it will lead to questions which will help you work out the related mechanics. In this example my first question would be "What happens when I pick up an item? Does it go into my inventory? Do I hold it in my hands? Can I use it? Do I craft things with it?" And as you start answering those questions you’ll start to define your other mechanics. 


Now that we understand mechanics, let's talk about another common phrase in prototyping: Rapid Prototyping


Rapid Prototyping is the process of quickly creating, testing, and iterating on prototypes. The first key here is speed, you want to find a testable solution as quickly as possible. You also want to have a clear direction so that you know what you are working towards and keep your goals in focus. And it is important to critically review everything you make during this process, you want to test everything, don’t be afraid of failure. 

The first part of the prototyping process involves assessing the design needs. Generally when you join an existing project there is a design document in place. 


The design document is full of useful information about the game, but it can be daunting and difficult to tell what is important and specific to the systems you are prototyping. 


Since this course focuses on prototyping the non-combat systems of the game, the most useful information to us is anything related to digging/looting and upgrading the tools and weapons. 

While assessing the design needs, it is important to keep the project resources in mind. 


Pretty much every game being developed has a limited amount of time, money, and people. Understanding the available resources is an important part of prototyping. 

In Part 2 we will dive into the game engine to build a Prototype Play Space. 

If you enjoyed this blog and want to learn more about these topics and follow along with hands-on examples, please check out my full course on Pluralsight - Prototyping Game Systems for Swords and Shovels


Thanks for reading!